Did you like the article? Share it!
Mockup Photoshop Free: how to edit and use them for your works
A mockup is perhaps the best way to present a product or brand. Having a suitable package of mockups in your designer arsenal is essential, but they won't do you any good if you don't know how to use them. This article will see how to edit a mockup Photoshop free to fit your brand and needs.
In the previous article, we talked about where to find quality mockups online and for wildly free. So, if you haven't seen the one that's right for you yet, read Best 5 websites to find mockups for free.
Well, if at this point you've found and downloaded the mockup template you need, it's time to tweak it to suit your needs. Whether you are a designer or the owner of a brand who wants to present a new product in the best possible way, this tutorial is for you.
In this short guide, we will exploit the Smart Objects of Adobe Photoshop or "special" layers or intelligent layers, which allow you to modify these files by inserting your graphics while preserving the original content of the mockup scene. In a nutshell, at a specific level, you apply your image and as if by magic, the program applies it to the object's surface in question. l’oggetto in questione.
Smart Objects do not require excellent design skills or complete knowledge of the software, so don't be afraid if you don't know how to use Photoshop in all respects. While there are free alternatives to PSD mockups, most of these templates are designed with Adobe Photoshop, so you need to own the program, or else you won't be able to edit them.
How do you edit a mockup PSD file?
The mockup models are files that present a specific three-dimensional object inserted in a scene on which a particular design can be inserted. These files are usually opened with Photoshop (.psd) and composed of those “special” layers we talked about before, making almost every surface of the model customizable.
Before we get started, though, let's see what you'll need to customize these files:
⬝ Mockup file in PSD format
⬝ Software to decompress compressed files (WinRar, WinZip etc.).
⬝ Basic knowledge of Adobe Photoshop.
⬝ Adobe Photoshop
⬝ Software to decompress compressed files (WinRar, WinZip etc.).
⬝ Basic knowledge of Adobe Photoshop.
⬝ Adobe Photoshop
Step 1: Unpack and open the model
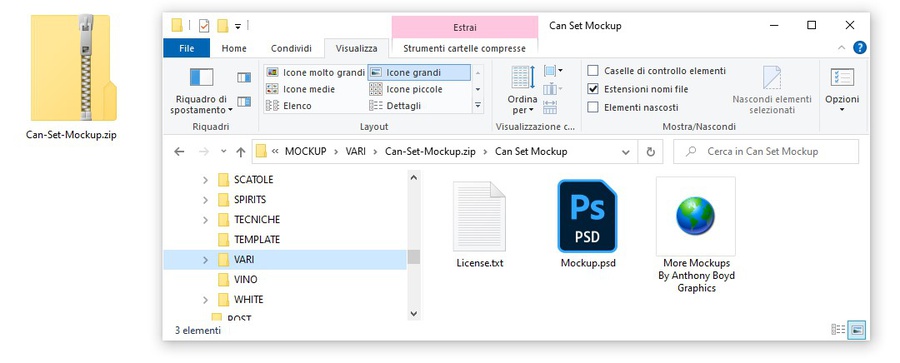
After downloading the template, you should find it on your computer in a compressed folder, which means that to open it, you will need to unzip it. In this file type, the .zip format is the most common to find, and the most used software is WinRar.
Open the compressed folder and search for the file with the .psd extension. Here, that's the file you need to use to edit the mockup, so double-click on it and open it with Photoshop. If you find multiple PSD files in the folder you downloaded, various templates are available in that package, probably with different orientations and features.
Remember! Always remember to read the license information regarding the use and distribution of the file, especially if you need to use it commercially. This information can usually be found in a document contained within the compressed folder.
Step 2: Find "Smart Object"
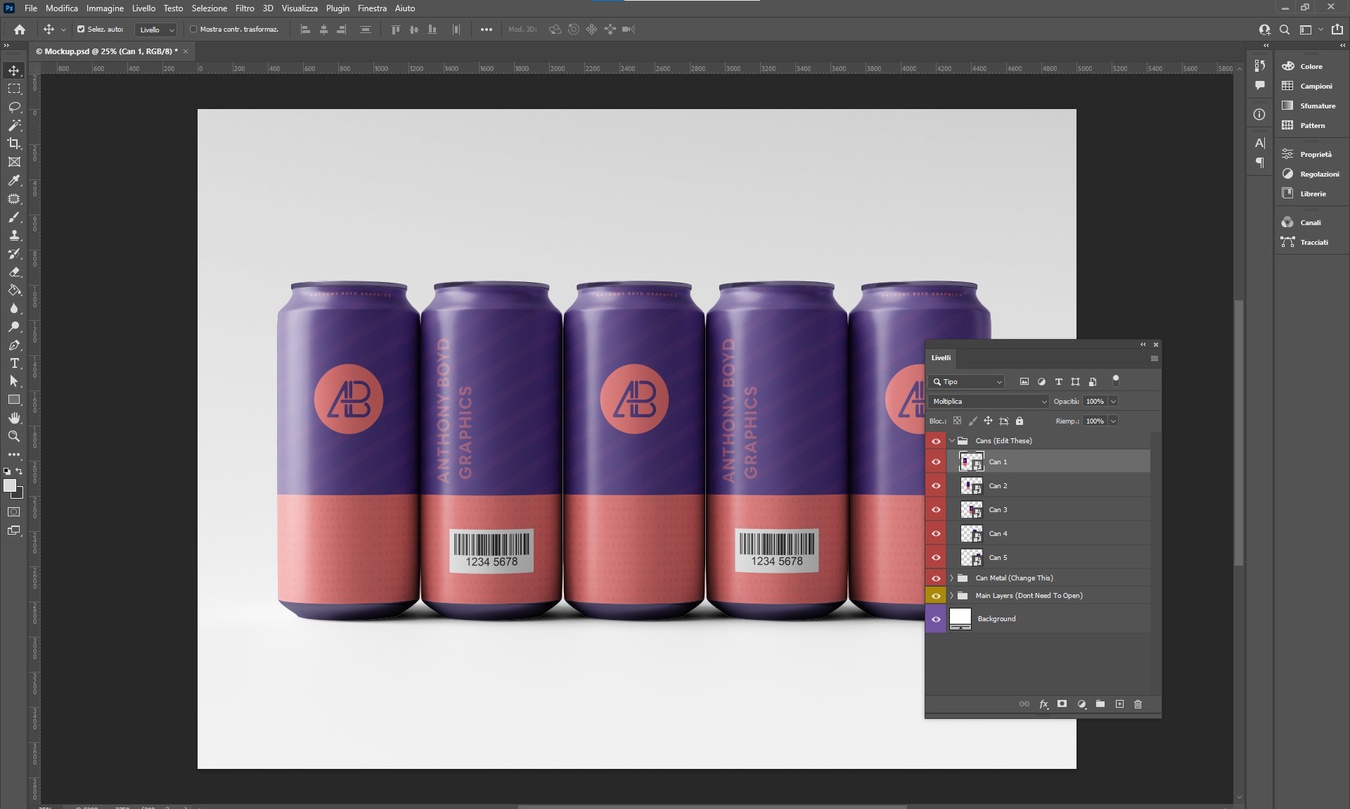
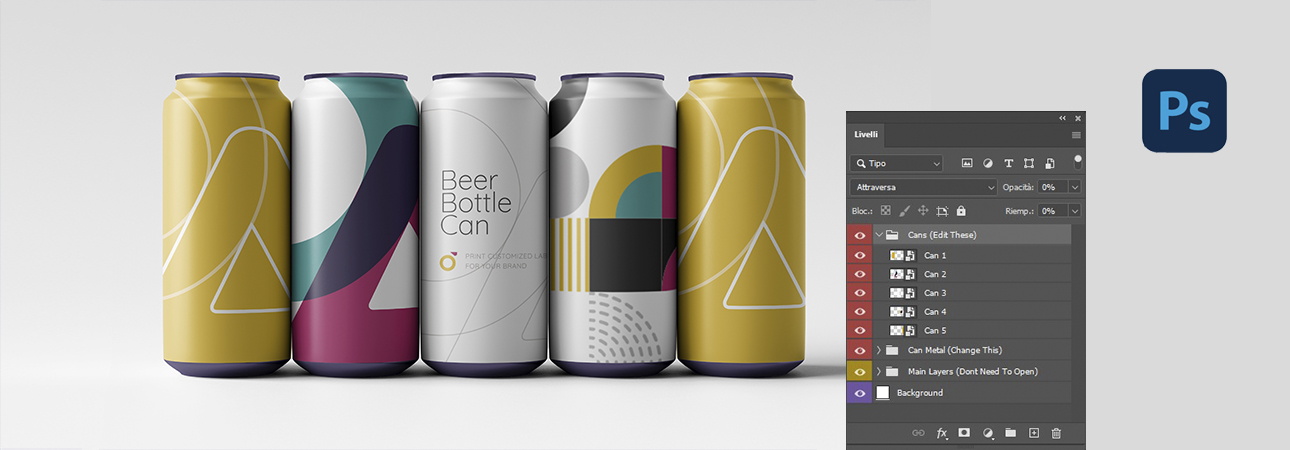
Opening the mockup, you will see an example graphic that acts as a "placeholder". What you will have to go to do is change that graphic, inserting your own. These changes can be done via the Layers panel using the Smart Objects we discussed earlier.
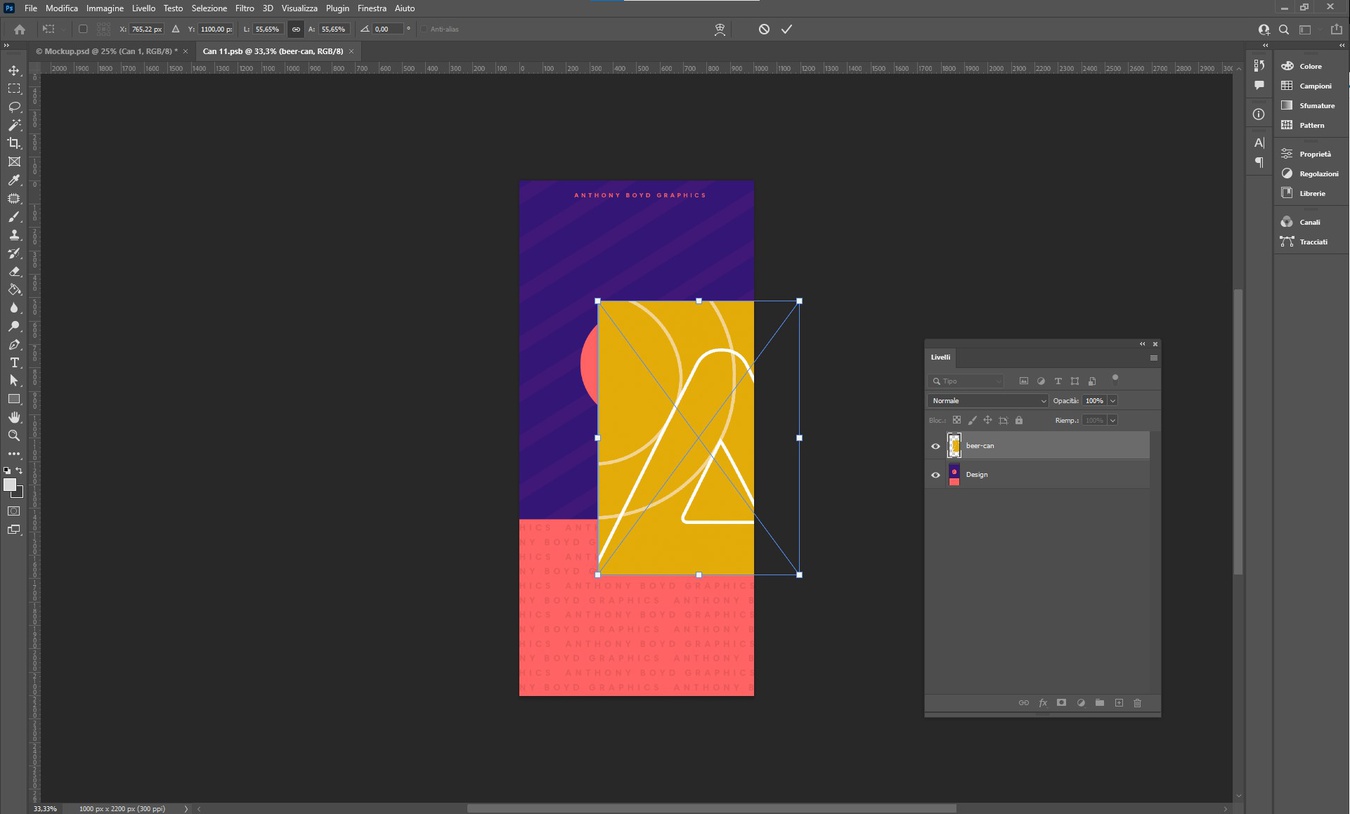
To locate them, you have to look at the Layers panel on the right of the screen. They are usually labelled with a placeholder name such as "add your design here"; that is the layer on which to place your graphics. To do this, you will need to double click on the Thumbnail preview of the Smart Object layer. By doing so, the object will open in a separate tab, where you will find the placeholder graphic presented to you of the mockup. You will face the two-dimensional version of what will then be reported in the file main in three dimensions.
Step 3: Insert your graphics
Now it's time to insert your design. You have to go to the File menu (top left) > Insert Embedded. Once you have selected your file from your computer folder, it will be inserted into the Smart Object. Resize and position it correctly to fit the size of the board. After inserting your design, you can delete the placeholder or hide it by clicking on the 👀 icon next to the layer to disable its visibility. We recommend importing a .png or .jpg file, depending on your needs.
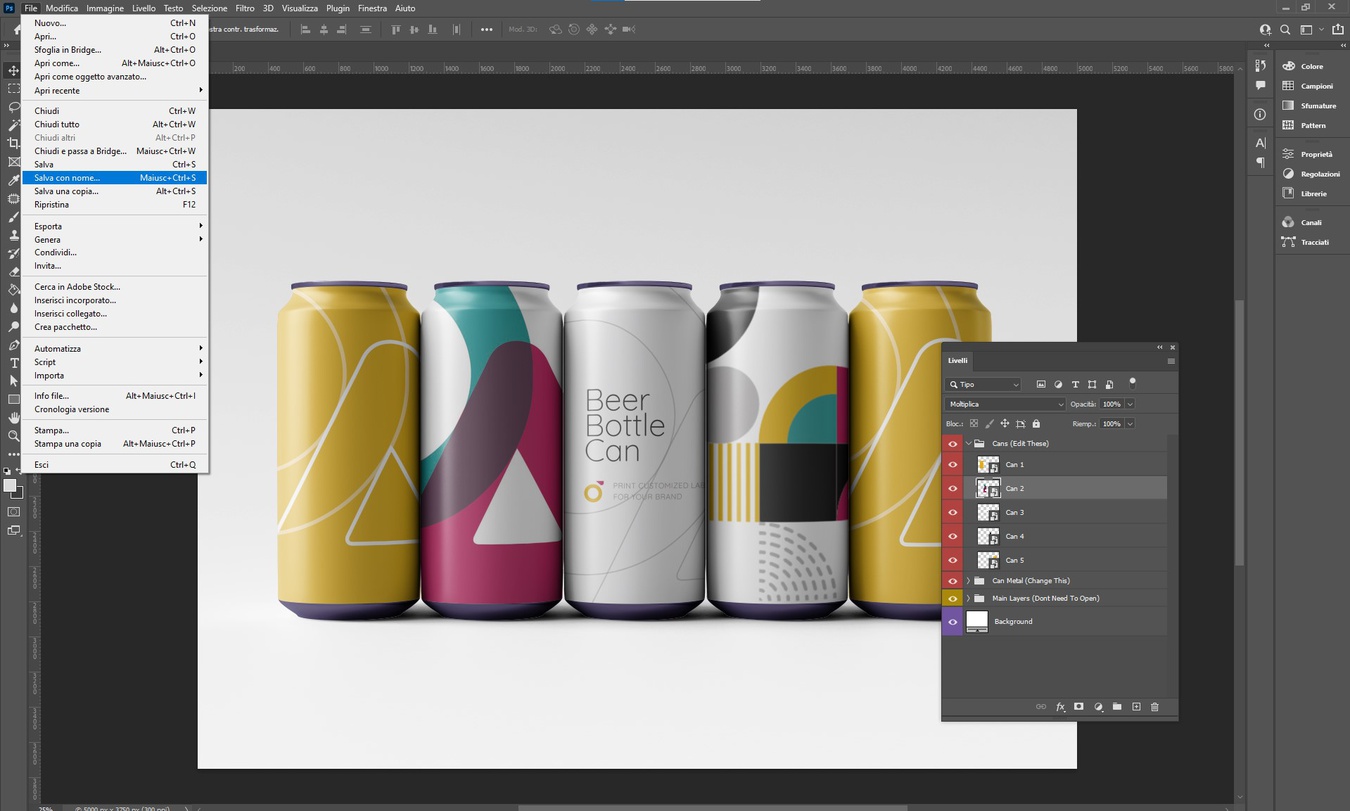
Once you have placed your design, go to File > Save to apply the changes to the template.
After that, go back to the mockup tab (the tabs are located at the top of the screen). As you can see, our graphics inserted in the Smart Object have been applied to the model. However, remember that if you do not save the changes in the Smart Object, they will not be used in the primary model. Another thing, one of the advantages of Photoshop and Smart Objects is that nothing is final; at any time, you can reopen the level and change your design.
Remember that another editable element is the background colour, just double-click on the layer thumbnail to the right of the Background Color layer name. The Color Picker panel should open from which you can set the one you want.
There may be one or more special levels containing advanced items; the more complex the mockup model, the more customizable surfaces will be. Each surface is equivalent to a specific Smart Object linked to it. The number of editable elements can also recognize a quality mockup.
Step 4: Save and export the model
Now that your design has been applied to the mockup template, the next step will be to save and export your work. Our advice is to permanently save an editable copy so that you can also put your hand to it at a later time. So, go to File> Save As and choose the .psd extension. With the same procedure, you can also save a copy as an image in .png or .jpg format to use or share elsewhere. Remember, if your mockup contains a transparent background that you want to keep, you will need to choose .png because the .jpg format does not support transparency. That's it, and your mockup is ready!
As you can see, editing and customizing a mockup template in Photoshop isn't as complicated as you think. If the file is of quality and well structured in a few simple steps, you will be able to insert your design and obtain, without too much effort, a realistic prototype with which to present your product.
We hope that this tutorial will be helpful to you and that we have been quite comprehensive.
Next

